Hyperion Docker
Warning
Hyperion Docker is not recommended for production environments, only for testing, debugging and local networks.
Hyperion Docker is a multi-container Docker application intended to get Hyperion up and running as fast as possible. It will index data from a development chain where you can set your contracts, push some actions and see what happens when querying the Hyperion API.
Recommend OS
Ubuntu 22.04
Architecture
Layers
To simplify things, we divided the microservices involved with Hyperion into layers.
- Blockchain (Leap with state-history plugin)
- Hyperion
- Infra (Elasticsearch, Redis, RabbitMQ)
The first layer would be the Chain itself - Node Service. For Hyperion to work, we need a chain to consume data from. In this layer, we will have a single microservice:
Leap Node
local chain for data consumption
The second layer would be Hyperion itself, which is divided into 2 microservices:
Hyperion API
This service allows interaction with the indexed data.
Hyperion Indexer
As its name suggests, this service connects to the Chain to fetch and index data.
And finally, in the third layer, which we can understand as Infra Services, there are 3 microservices:
- Elasticsearch
- Redis
- RabbitMQ
** We added 2 extra microservices to facilitate debugging. These microservices need additional commands to be executed; see *running extra tools section.
- Kibana
- RedisCommander
Image Infrastructure
Infra Image

Considering this structure, the Project Repository has 3 folders representing each mentioned layer.
- ../hyperion-docker
- hyperion
- infra
- nodeos
In each directory mentioned above, we added a docker-compose.yaml file that will be responsible for starting its respective microservices.
For those who have never used docker-compose, it allows the creation of several containers simultaneously. These containers are declared as services.
Example docker-compose.yaml
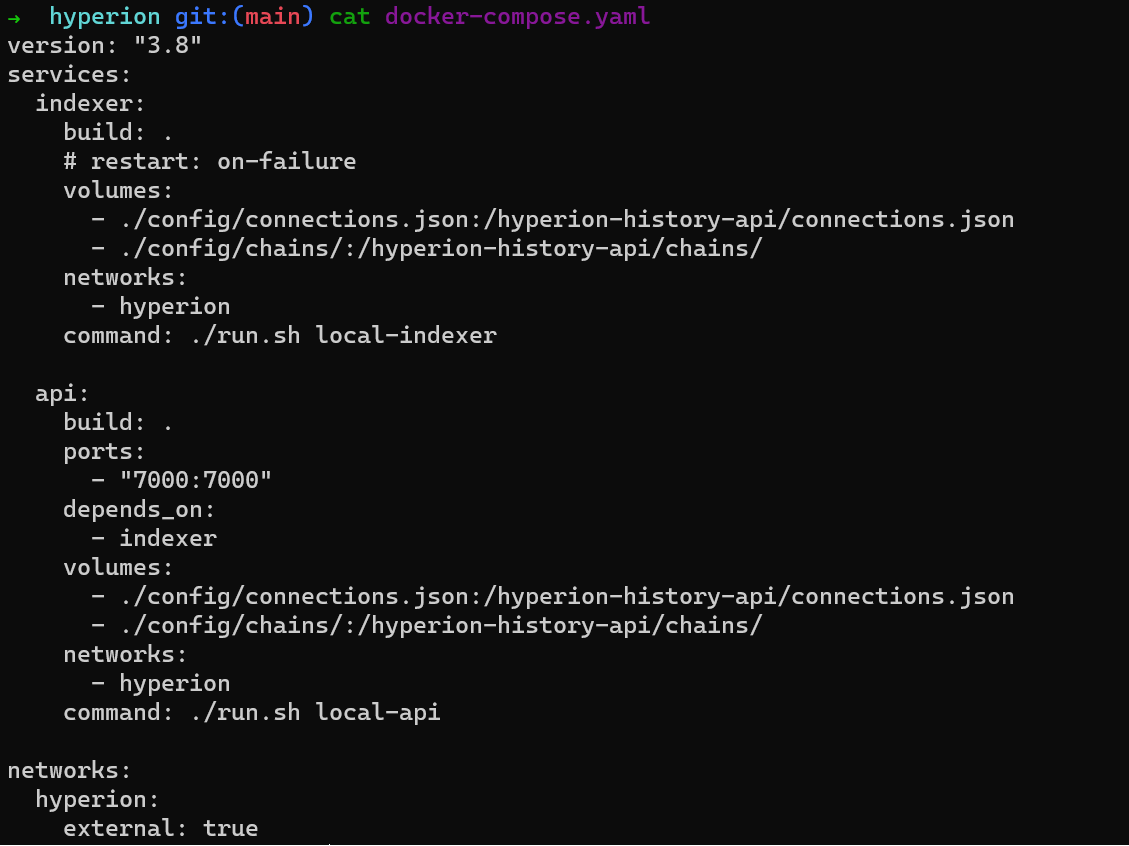
All services (containers) declared within a docker-compose.yaml share the same network by default. Still, as we will separate the containers into different files, we will need to create a network in Docker that will be shared. The procedure will be detailed below in the configuration process.
Getting Started
Prerequisites
Before starting with the containers, we need to make some Linux configurations to ensure we are fine with Elasticsearch. Edit the file /etc/sysctl.conf
sudo nano /etc/sysctl.conf
Add the following properties:
vm.overcommit_memory=1
vm.max_map_count=262144
To ensure the settings are working without restarting the machine, just run:
sudo sysctl -w vm.overcommit_memory=1
sudo sysctl -w vm.max_map_count=262144
Now let's get started!
Infrastructure Layer
1. Clone the repository
Clone the repository to your local machine:
git clone https://github.com/eosrio/hyperion-docker.git
cd hyperion-docker
2. Verify Docker is running
Make sure Docker is running by executing the following command in the terminal:
docker ps
Expected result

3. Create shared network
Create a network that will be shared between the containers by running the command:
docker network create hyperion
Expected result

4. Create the microservices
Now, let's start creating the microservices of the infrastructure layer.
Navigate to the infra directory of the repository and run the following command:
cd infra
docker compose up -d
-d flag
Note that we use the -d flag to run in detached mode, allowing us to continue using the session's command line.
This command will create the 3 microservices (Elasticsearch, Redis, RabbitMQ).
The first time you run the command, it may take some time for everything to be set up. You can follow the execution log using the command:
docker compose logs -f
Press Ctrl+C to end the log reading process.
5. Running extra tools
Assuming that the 3 microservices are up and running, we added 2 extra microservices (Kibana and RedisCommander) to the docker-compose that can be executed with the following command:
docker compose --profile tools up -d
These two microservices are responsible for the graphical interfaces interacting with Redis and Elasticsearch.
RedisCommander is a tool that allows you to view the data stored in Redis. It is useful for debugging and checking if the data is being stored correctly.
Kibana is a tool used to monitor your Elasticsearch cluster and view the data stored. It is useful for creating dashboards and graphs to visualize the data.
6. Check services
Check if the services are up and running:
-
RabbitMQ - http://localhost:15672/
-
Kibana - http://localhost:5601/
-
RedisCommander - http://localhost:8089/
Once we have completed the Infrastructure Layer configuration, we can move on to the Leap (nodeos) Layer.
Leap (nodeos) Layer
Navigate to the nodeos directory in the repository and run:
cd ../nodeos
docker compose up -d
Once the infrastructure and the blockchain node are configured, we can finally start Hyperion.
Hyperion Layer
This layer has 2 microservices, Hyperion API and Hyperion Indexer.
To start them, navigate to the hyperion directory and run the following command:
cd ../hyperion
docker compose up -d
Troubleshooting
If you're having problems accessing Kibana or using Elasticsearch API, you could disable the xpack security on the docker-compose.yml setting it to false:
xpack.security.enabled=false
Next steps
Feel free to change configurations as you like. All configurations files are located in hyperion/config or nodeos/leap/config.
For more details, please refer to the Hyperion Configuration Section .