Hyperion Configuration
We've developed a tool to automate the configuration of Hyperion. It initializes the connections with all the dependencies and creates the configuration for each chain you are running.
Warning
Check Connections Reference to add the new failover option.
Make sure you are in the installation directory:
cd ~/hyperion
Tip
Run ./hyp-config --help for more details.
Initialize connections
First, let's initialize our configuration. Just run:
./hyp-config connections init
Note
This command will check the connection to Elasticsearch, RabbitMQ, Redis and MongoDB. Make sure everything is up and running. The wizard will prompt you for each service's host, credentials, and connection details.
You can use ./hyp-config connections test to test connectivity at any point and ./hyp-config connections reset to back up and remove the current configuration.
The initialization command will create a connections.json file that follows the template described here.
Add new chain
Now you can proceed and add a new chain to your configuration. Run the following command:
./hyp-config new chain eos --http "http://127.0.0.1:8888" --ship "ws://127.0.0.1:8080"
This command will create a chains/eos.config.json file that follows the template described here and also configure the state history section of the connections.json file for this chain.
Check your chain configuration
Finally, check your configuration running:
./hyp-config list chains
You should see an output similar to:

Running Hyperion
We provide scripts to simplify the process of starting and stopping your Hyperion Indexer or API instance. By default these use pm2.
Starting
To run the indexer, execute ./run [chain name]-indexer
To run the api, execute ./run [chain name]-api
Examples
Starting indexer for "eos" chain:
./run eos-indexer
./run test-api
Note
You need to pass the name of the chain you previously created followed by indexer or api to indicate the instance you want to start.
Stopping
Use the ./stop script to stop an instance as follows:
Examples
Stop API for EOS mainnet:
./stop eos-api
./stop wax-indexer
Note
You need to pass the name of the chain you previously created followed by indexer or api to indicate the instance you want to stop. Stopping the indexer performs a graceful controller shutdown (clean flush), never a hard kill.
Running without pm2 (systemd)
pm2 is the default and recommended supervisor. Operators who prefer not to use pm2 can run Hyperion under systemd instead — pm2 users are unaffected.
Install the unit templates from the repo's systemd/ directory (see
systemd/README.md), then either drive systemctl directly or run the same
./run / ./stop commands with the HYP_NO_PM2 environment variable set,
which routes them to systemd:
Examples
HYP_NO_PM2=1 ./run wax-indexer     # -> systemctl start hyperion-indexer@wax
HYP_NO_PM2=1 ./stop wax-api        # -> systemctl stop  hyperion-api@wax
Single-instance API without pm2
Without pm2 the API runs as a single instance — pm2's cluster-mode
multi-worker scaling is not reproduced and api.pm2_scaling becomes a
no-op. If you need a multi-instance API, keep pm2 (the default) or front
several hyperion-api@<chain> units with a reverse proxy. The indexer is
unaffected — it manages its own workers and stops gracefully either way.
Attention
The stop script won't stop Hyperion Indexer immediately, it will first flush the queues. Be aware that this operation could take some time.
Indexer
The Hyperion Indexer is configured to perform an abi scan ("abi_scan_mode": true) as default. So, on your first run,
you'll probably see something like this:
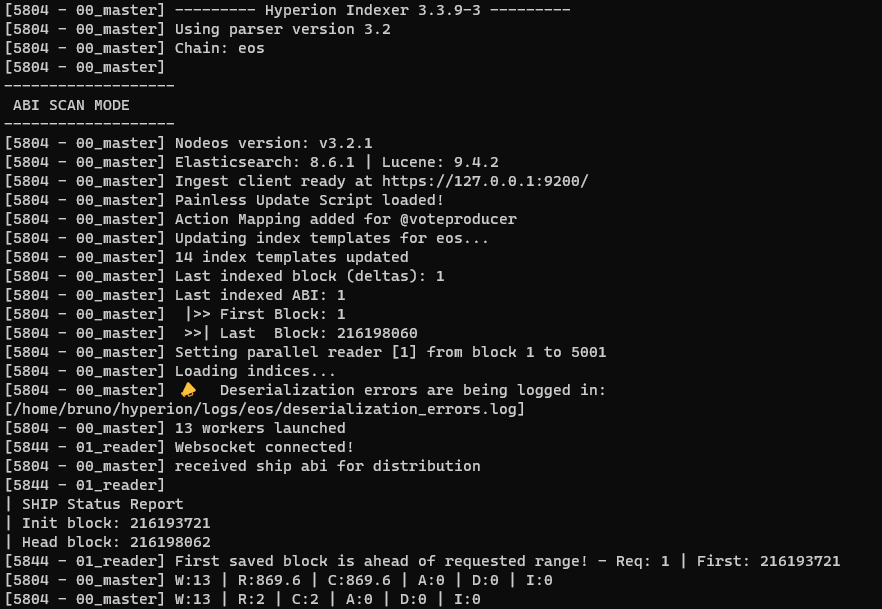
This an example of an ABI SCAN on the WAX chain.
Where:
- W (Workers): Number of workers.
- R (Read): Blocks read from state history and pushing into the blocks queue.
- C (Consumed): Blocks consumed from blocks queue.
- A (Actions): Actions being read out of processed blocks.
- D (Deserialized): Deserializations of the actions.
- I (Indexed): Indexing of all of the docs.
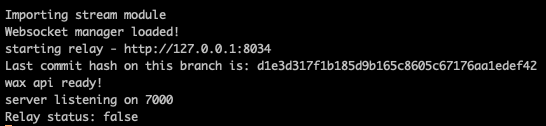
API
After running the api, you should see a log like this:
Now, it's time to play around making some queries.
Tip
we are using jq to format the json output for better readability
if you don't have it installed use
sudo apt install jq
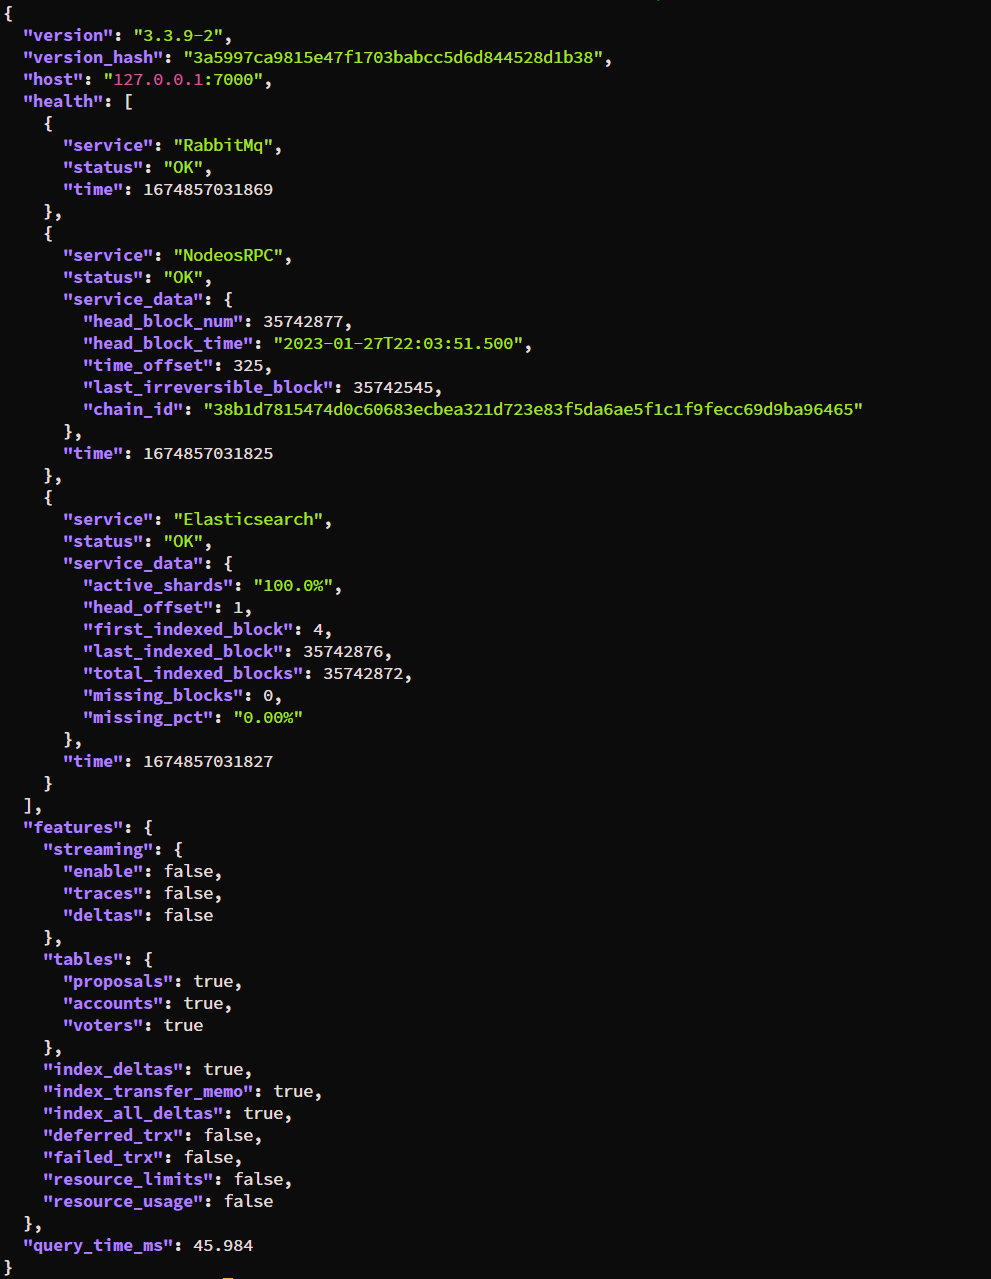
First, let's test the health check endpoint
curl -Ss "http://127.0.0.1:7000/v2/health" | jq
View example
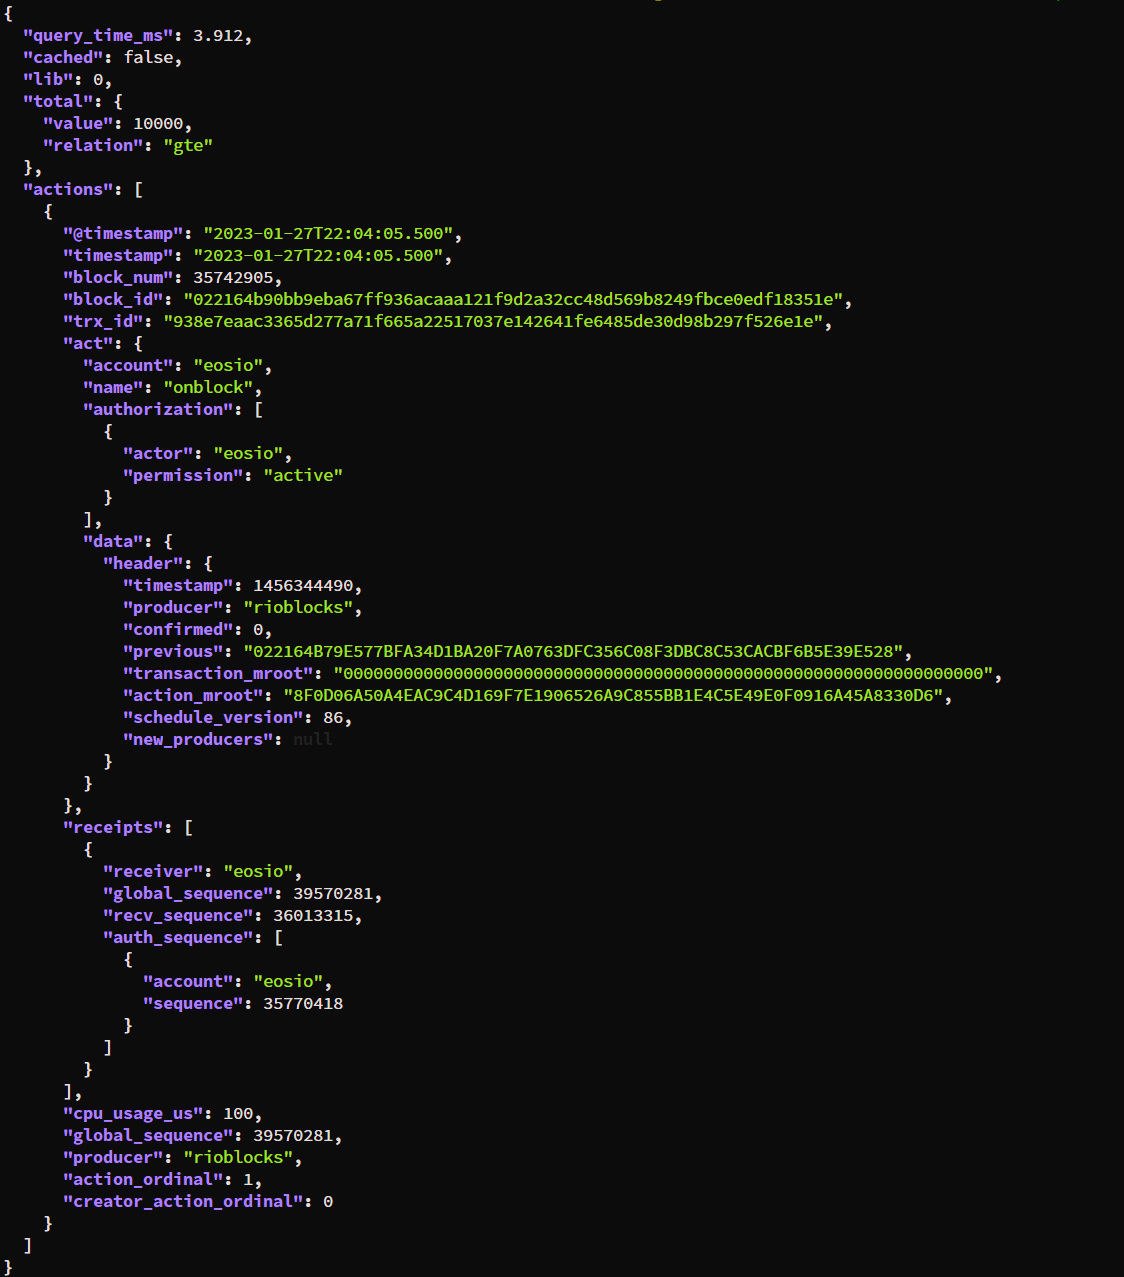
Then we can ask for the last action on chain:
curl -Ss "http://127.0.0.1:7000/v2/history/get_actions?limit=1" | jq
View example
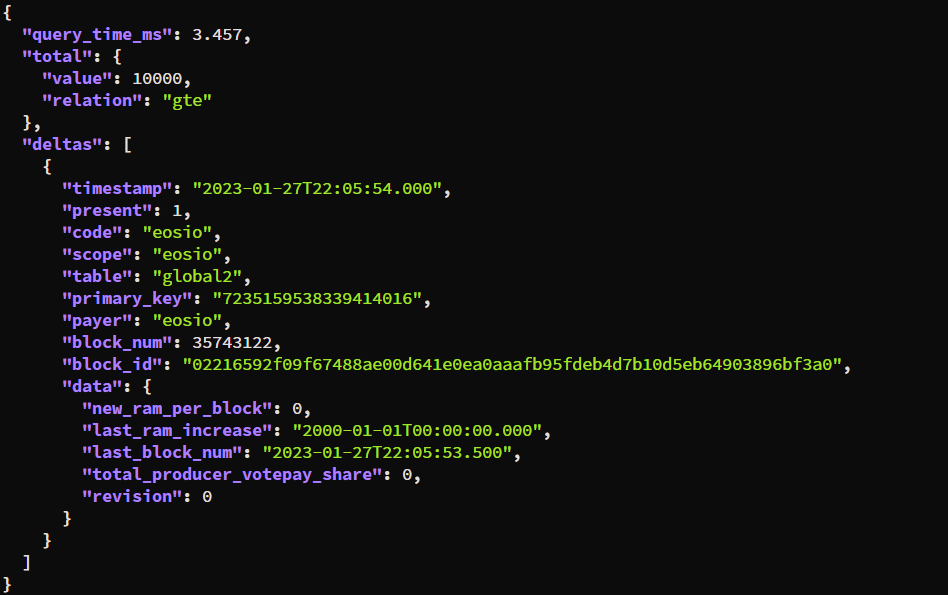
We can do the same for deltas:
curl -Ss "http://127.0.0.1:7000/v2/history/get_deltas?limit=1" | jq
View example
You can check the Swagger UI at: http://127.0.0.1:7000/v2/docs for more information on all the available endpoints
State Synchronization (MongoDB)
Hyperion stores chain state in MongoDB collections: accounts, permissions, proposals, and voters. These collections are populated automatically during indexing, but you can also rebuild them on demand using the sync commands.
Info
The sync commands connect directly to the chain API and rebuild the MongoDB collections from current chain state. They are safe to run at any time and use upsert operations, so they won't duplicate data.
Available Sync Commands
| Command | Description |
|---|---|
./hyp-control sync permissions <chain> |
Rebuilds permissions including linked actions |
./hyp-control sync accounts <chain> |
Synchronizes account balances and metadata |
./hyp-control sync voters <chain> |
Rebuilds voter registrations and delegations |
./hyp-control sync proposals <chain> |
Indexes active multisig proposals |
./hyp-control sync contract-state <chain> |
Syncs custom contract table state (requires features.contract_state config) |
./hyp-control sync all <chain> |
Runs voters, accounts, proposals, and contract-state in sequence |
When to run sync commands
- After upgrading Hyperion to a new version
- After recovering from indexer errors
- To rebuild state after database maintenance
- When setting up a new chain and you want immediate state without waiting for the indexer to catch up
Custom Contract State Indexing
You can configure Hyperion to index specific contract tables into MongoDB. Add the contract configuration to your chain config under features.contract_state.contracts:
"features": {
    "contract_state": {
        "contracts": {
            "eosio.token": {
                "tables": {
                    "accounts": {
                        "autoIndex": true
                    }
                }
            }
        }
    }
}
Use ./hyp-config contracts add-single <chain> <account> <table> <autoIndex> to add contracts via CLI.
Enabling Streaming
Once your indexer is finished and it's only reading live blocks, you can enable the streaming api if needed. To do so, enable all options under features.streaming in your chain config file
"features": {
    "streaming": {
      "enable": true,
      "traces": true,
      "deltas": true
    }
By default, the stream api will be available on the port 1234, this can be configured by the api.stream_port property in the chain config file.
Once you're done configuring, just restart both the indexer and api.
A quick test using curl 127.0.0.1:1234/stream/ should result in the output {"code":0,"message":"Transport unknown"} meaning the port is ready for websocket connections.
Alternatively, you can check the api logs after restart for a Websocket manager loaded! message
NGINX
if you are using NGINX as your reverse proxy, use the following block to properly forward your /stream path to the correct port
location /stream/ {
    proxy_set_header X-Forwarded-For $proxy_add_x_forwarded_for;
    proxy_set_header Host $host;
    proxy_pass http://127.0.0.1:1234/stream/;
    proxy_http_version 1.1;
    proxy_set_header Upgrade $http_upgrade;
    proxy_set_header Connection "upgrade";
}
Finally, clients using the Hyperion Stream Client will be able to connect.
Plugins Set Up
Plugins are optional. Follow the documentation on the required plugin page.
Official Plugins:
- Hyperion Explorer — see Explorer Setup for installation instructions
Deprecated
The old hyperion-explorer-plugin has been replaced by the standalone hyperion-explorer repository.
Experimental Feature
Running 3rd-party plugins could be dangerous, please make sure you review the published code before installing